
If you've ever wondered what to do to finish your doors and windows, this is the place for you. Finishing trim is a complex process that requires several steps. In this article, you'll learn the proper techniques and materials for installing your trim. After you've mastered these steps, you can start applying the trim yourself! Here are some tips to make the process as easy as possible. No matter whether you are working on a DIY or professional project, you will be well on your path to a beautifully finished window or door.
Techniques
Whether you're a seasoned professional or just a do-it-yourselfer, knowing the proper techniques for finishing trim is essential for a job well done. There are a few tips that will make your job easier. One of the most important tips is to avoid making common mistakes while putting in trim. Here are some tricks to avoid. They can save you a great deal of time and headaches.
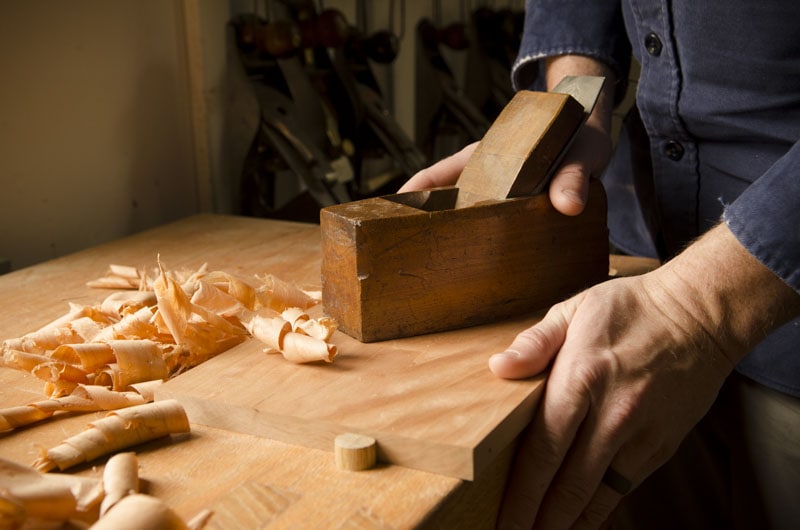
Tools
Sharp pencils are the best tool in any carpentry job. A good pencil can be worth its weight when trimming the ends. One third of an ind can make the difference between a good and perfect installation. You need to keep your pencil sharp, so make sure you buy enough trim to complete your project. These are the essential tools you will need for trimming your trim. They will make your job go much smoother! Keep in mind that the sharper your pencil is, so the installation of trim will go more smoothly.
Materials
You can choose from a variety of materials to finish trim, including wood or synthetic materials. Some types are made with plaster and other materials. While others are made out plastic. Trim is sometimes referred to by the names casing and molding. This article will provide information on the various types of trim as well as how to properly install them. Consider the style and color scheme of the room when choosing trim material. It may be a good idea to test different materials to see which one will work best for you.
Preparation
There are many things you need to keep in mind when painting. Preparation is not only important for the final result but also for the flow of the project. Make sure to gather all necessary supplies and place them in an easily accessible place. Once you have collected all your supplies, it is time to clean them properly before you start the process. These tips will help you prepare your trim correctly. After trimming your trim is clean, you can start applying the final coat.

How to choose a finish
There are three types of wood trim paint: semi-gloss or high gloss. Each finish has a distinctive look. Choosing one will depend on the color of your trim and the overall look of your house. These tips will help you choose the perfect paint finish for your house. Below are the main paint finishes that wood trim can be used to help you choose the right paint finish. For a detailed comparison of each finish, read on.
FAQ
Where to buy Hardwood Lumber
Home Depot offers hardwood lumber. They offer a wide range of wood products including flooring, cabinets, furniture and more.
There is also a wide selection of engineered hardwoods, including Ipe (Araucaria Angustifolia), Brazilian Cherry(Pau d'Arco), Mahogany (Swietenia Mcrophylla).
You can search Google for hardwood lumber to find them online.
You can learn how to woodwork.
It is best to do it yourself. Woodworking is an art form that requires patience, practice, skill, and experience. To master any craft, it takes time.
Learning how to do something is best done by doing it. Start small, and work your way up from there.
What material would your recommendation be to learn woodworking?
You can start with softwoods like pine or poplar. When you feel confident with these two, move on towards hardwood.
Statistics
- The best-paid 10 percent make $76,000, while the lowest-paid 10 percent make $34,000. (zippia.com)
- If your lumber isn't as dry as you would like when you purchase it (over 22% in Glen Huey's opinion…probably over 10-15% in my opinion), then it's a good idea to let it acclimate to your workshop for a couple of weeks. (woodandshop.com)
- Woodworkers on the lower end of that spectrum, the bottom 10% to be exact, make roughly $24,000 a year, while the top 10% makes $108,000. (zippia.com)
- In 2014, there were just over 237,000 jobs for all woodworkers, with other wood product manufacturing employing 23 percent; wood kitchen cabinets and countertop manufacturing employing 21 percent. (theartcareerproject.com)
External Links
How To
How to join wood with no nails
Woodworking is a favorite hobby. Woodworking can be a fun hobby because you can work with your hands to make useful objects from wood. You may need to join two pieces without the use of nails. This article will explain how to do this so that your woodwork projects stay beautiful.
First, remove any sharp edges from the wood pieces before you join them. Do not leave any sharp corners as they could cause problems down in the future. Now you can start gluing the boards together.
If you're working with hardwood, you should only apply glue to one side. If you're using softwoods like pine or cedar, you should put glue on both sides. After applying the glue, press the boards firmly until they are completely stuck together. Be sure to let the glue dry before you move on to the next step.
After you have glued the boards together, drill holes in the joints where you intend to place screws. These holes will differ depending on the type and size of screw you are using. For example, if your screw is a 1/2-inch wooden screw, drill a hole that is at minimum 3/4 inches deep.
Once you have drilled your holes you will need to drive the screws through each joint and into the backside. You should be careful not to touch the board's front surface. This could cause damage. When driving the screws, try to avoid hitting the ends of the screws too much. This will help prevent splitting of the end grain.
Protect your finished project now. You can seal the furniture pieces or cover the top. You want it to last years, so you can use any product. Examples include oil-based varnishes and polyurethanes, shellac, lacquer and others.
These products can usually be found at any home improvement store. It is important to ensure that you purchase the correct product for the job. Some finishes are toxic and should not ever be used indoors. Wear protective gear whenever you are handling them.