Scroll saw projects are a great choice. Here you can find hundreds of scroll saw projects for your enjoyment. A Santa mobile or wooden Nativity can be made. You can also make coasters and intarsia items. Scroll saws can be a great tool to have at home. Here are some ideas. Just remember, you will need to use caution when cutting wood.
Making a Santa mobile
You don't need to be a master at scrollsaw to make a Christmas mobile. Start by cutting two stars. Start by cutting two stars. The first should have a hole in it's point and the second should be indented on its bottom. Use coiled metal to join the pieces. You can then paint them as you wish. You'll then need to let them dry a few days.
How to make a wooden nativity
This easy DIY project will make a Nativity scene to decorate your home. Download the scrollsaw nativity template at i.pinimg.com. Follow the instructions to create this wooden nativity set. It will look amazing in any room and makes a unique gift for children! This tutorial will take you through the entire process of creating this Nativity scene.
Making coasters
Scroll sawing involves a complex process. Making coasters using your own saw is not an easy task. Scroll Saw projects look much easier because of the intricate patterns. It is easy to make coasters suitable for all seasons by following a few simple steps. Make sure that you have enough spare time to complete the project. These are some helpful tips to make coasters using your Scroll Sawer. Don't forget to take patience with this project and pay close attention.
Making intarsia
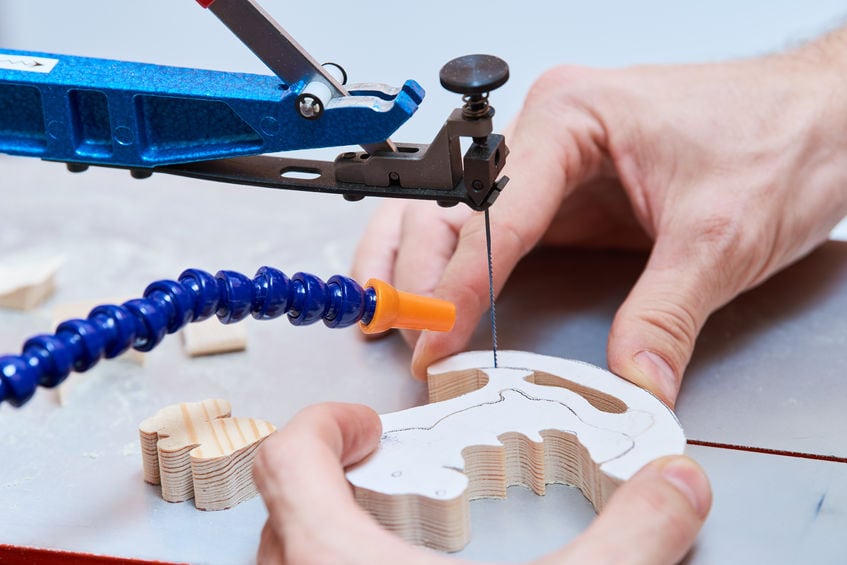
To make a scroll saw project a success, you must plan your cuts well and use the correct technique. The first step is to make sure that you have a clean cut. You can find intarsia patterns online if you don't know how to cut it. Scroll saws need precise measurements. It is important to examine the grain patterns and take accurate measurements before cutting. To see the pattern lines, ensure you cut squarely. A foot switch can be used to prevent you from cutting expensive wood. Another option is to deburr your pieces before you cut them. Double-sided tape and sanding stones can be used to smoothen transitions, and prevent sharp bits being removed.
Toppering a switch

A scroll saw can also be used to turn boring wood into an attractive change plate. The scroll saw can cut complex patterns of any complexity and can make intricate or simple designs. A simple project is a good choice for beginners, such a frog-shaped plate. You can find scroll saw plans and designs online and print them for future reference.
Making corbels
Making corbels using scrollsaw projects is one of the best parts. You can add a decorative touch without spending a lot of money on this simple project. You can make corbels to decorate your kitchen and bathrooms. You can also make a corbel from vintage corbels if you have the time. This will add style and protection to your home from income tax auditors.
Making a puzzle out of pictures
You can create a picture frame with scrollsaw projects using the same steps as for other crafts. First, you'll need a piece (1 x 8 inches) of pine wood. To make it more easy to remove the piece after you've cut it, you can use spray adhesive or painters tape to cover it. Next, cut out the puzzle design. Spread it with your fingers and the puzzle pieces will fit together.
Making a Jigsaw
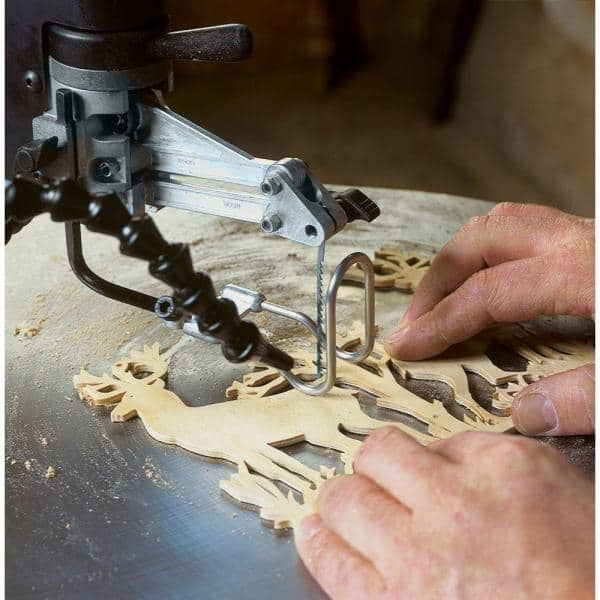
If you're looking for a fun project to complete with your scroll saw, try making a jigsaw puzzle. Many jigsaw puzzles have interlocking pieces that allow you to move them without disturbing them. You will need to pick pieces with matching features in order to create a scrollsaw. If you have a pattern in mind, you can find a jigsaw puzzle design online, or search for an existing one in a book.
FAQ
Can I refinish my own furniture?
Yes! There are plenty of ways to refinish old pieces of furniture without having to pay a pro. Here are some examples:
Use sandpaper for removing stains and scratches. After that, use a clean towel to wipe the surface.
Apply clear polyurethane varnish. Allow furniture to dry completely before you move it around.
Paint furniture with acrylic paint.
Stain can be used instead of paint. You can give your furniture a rich appearance with stain.
Use shellac wax. Wax will protect the wood and add shine.
What is the difference of plywood and particleboard?
Plywood consists of layers made from wood and pressed together by pressure. Plywood can come in many thicknesses and is used for flooring and cabinets. Particle board consists of sawdust mixed and resin. The resin is then compressed into large blocks. It's used for home improvement projects. Both types are sturdy and easy to cut.
Are you able to teach yourself woodworking
The best way to learn anything is by doing. Woodworking takes practice, skill, patience and experience. It takes time to master any craft.
To actually learn something is the best way. So start small and build on what you have learned from there.
What woods are suitable for making furniture?
Woods are classified by their hardness. Softwoods include cedar and pine as well as cedar and cedar. They are great for outdoor furniture as they resist rot. Hardwoods include oak, maple, mahogany, and teak. They're generally used indoors because they won't weather well outdoors.
What type of wood should I choose?
Oak, maple, cherry and mahogany are the most common wood types used for woodworking. Every type of wood is different and can have a unique look and feel that will affect the final product. Oak is a darker wood and tends to be more durable than other types. Birch is light and soft, while mahogany can be heavier and more dense. You can also pick between veneers and solid wood. Veneers are thin wood sheets that are glued together to form one layer.
How can I keep my shop organized?
A designated place to store your tools is the first step towards keeping your workshop clean. Make sure your tools are clean and free of debris and dust so they can be used properly. You can hang tools and accessories with pegboard hooks.
Statistics
- Most woodworkers agree that lumber moisture needs to be under 10% for building furniture. (woodandshop.com)
- In 2014, there were just over 237,000 jobs for all woodworkers, with other wood product manufacturing employing 23 percent; wood kitchen cabinets and countertop manufacturing employing 21 percent. (theartcareerproject.com)
- Average lumber prices rose about 600 percent between April 2020 and May 2021. (familyhandyman.com)
- Woodworkers on the lower end of that spectrum, the bottom 10% to be exact, make roughly $24,000 a year, while the top 10% makes $108,000. (zippia.com)
External Links
How To
How to make wood joints
This tutorial will teach you how to join two pieces wood together. The "pocket hole joint" is a method whereby we drill holes into the wood and glue them together. This works well if the wood is straight and smooth. Try dowel joinery instead if your wood doesn't look straight. These are the steps
-
Drill Pocket Hole Joints. You will need to measure and mark the exact location of your pocket hole joint. Next, drill 3/4 inch holes in each end of each piece using a handheld drilling machine or jigsaw.
-
Sand Smooth. Sanding the edges of the wood will help to prevent the joint from splitting later.
-
Glue Together. Apply glue to both ends of the wood. Let the wood sit for 5 minutes, then clamp it together.
-
Fix the Pieces together. After the glue has dried completely, you can clamp the pieces together until they are flush.
-
Trim Joinery. Trimming the joinery after glue has completely dried.
To be able to turn the pieces inside-out, leave enough room between them.