
Have you had problems with your scroll-saw's blade tension? You are not the only one having trouble setting the blade tension on your scroll saw. Many people have trouble determining the correct blade tension for flower designs on their scroll see. This article will discuss blade tension, stack cutting, the Workpiece Foot lock, and how each component of the scroll see is identified. By the end of this article, you'll know what to do, and how to adjust the tension for flower patterns.
Adjusting the blade tension to create scroll saw flower designs
It is vital to ensure that the scroll saw blade is correctly adjusted and the tension is correct. The scroll saw may not work properly if these two elements are not correctly adjusted. The blade may be in any style, but the tension setting should match the design. Scroll saw manufacturers often have their own ways to adjust the tension. For detailed instructions, please refer to the manual. These are some useful tips.
First, make sure that the table is square with the blade. You can use a small square or a ruler to do this. Your scroll saw's tilt will also not be accurate. It is important to check the scales on your scroll saw's blade-tilt regularly. Once you have set the blade-tension, you can cut the flower patterns. Be sure to not make the blades too tight.
Stack cutting
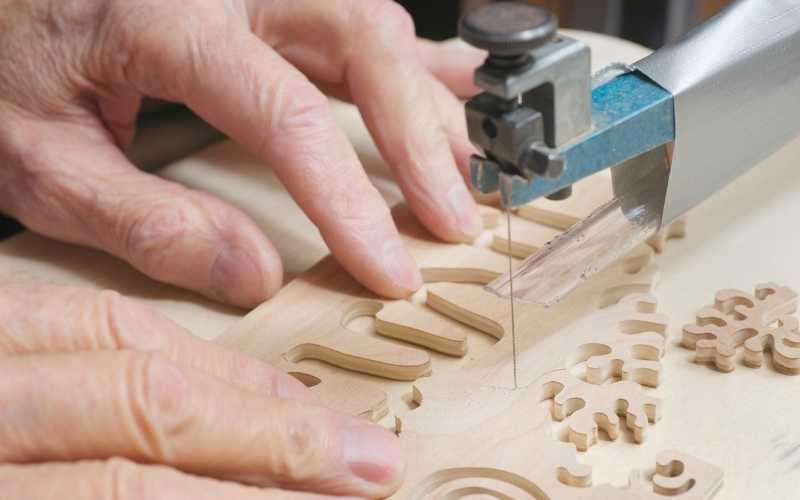
To create a scrollsaw flower shape, stack some pieces of wood together. To hold the pieces together, you can use double-sided tape. Scrollers may use small nails or toothpicks for securing their stacks. Staples and old circular saw blades can be used as binding tools. This will stop the layers from shifting. Once each layer is secured to the previous, you are ready to begin cutting.
Magnification allows for more precise cuts. A magnifying mirror mounted on the scrollsaw, or a tool lens, is useful. For a better illumination of your work area, you can consider purchasing a magnifying led work light. Some work lights include a magnetic or clamping base to make it easier to move your work area. There are many types of scroll saws available. Select the one that meets your needs.
Locking the footpiece
There are many options to choose the right drop foot that will fit your scroll saw. The foot should be placed on the workpiece and should not drag. After each adjustment, ensure that the foot lock on the workpiece is securely tightened. Next, adjust the speed knob to the desired setting. This will depend on what material you are cutting, how thick and how many of the teeth your blade has. Lastly, make sure that the workpiece is secured in the drop foot.
Scroll saws aren't the best tool for every job. These scroll saws are for specific jobs. You can use the workpiece lock to protect the wood when you are cutting a flower design. This will prevent your workpiece from moving as you cut. Consider how much weight you will be using for the cut. A larger blade might be a better choice if you are planning to cut large flowers.
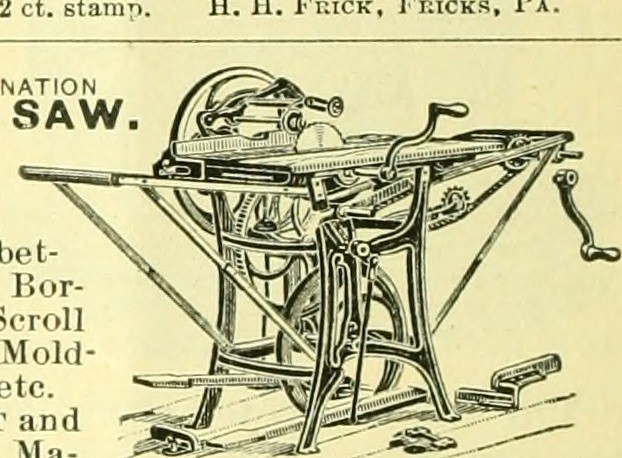
Identifying the parts in a scroll saw
Scroll saws are classified according to their throat size. This measure is the distance between a scroll saw's blade and its rear frame. The size of the throat determines how large the wood can be cut. Smaller saws tend to have a shallower throat, while larger industrial saws can have a deeper throat. Before computer automation, industrial saws were often used to cut larger objects. For most home projects, however, a simple scroll saw will suffice.
If you are not quite sure how to start a project, you can always start by downloading a free flower scroll saw pattern. These patterns come with detailed instructions about how to construct them. They are simple to follow and can be used as beautiful decoration. They can be used in your classroom, kitchen or as decorative items. Scroll saws are great for making practical items as well. Identifying the parts of a scroll saw flower pattern can be challenging, but it can be done!
FAQ
How do I calculate woodworking prices
The most important thing to remember when calculating costs for any project is to keep them as low as possible. Always make sure you get the best price on materials. It is important to take into consideration all factors that can impact the cost of your projects. These include time, skill and experience. Our guide to the average household DIY task price will give you an idea of how much it costs to complete different types of woodwork projects.
What type of wood should I choose?
Woodworking is a popular job that involves oak, pine and maple. Each type of wood has unique characteristics that affect the look and feel of the final product. For example, oak tends to be darker and harder than other woods. Birch is light and soft, while mahogany can be heavier and more dense. You also have the option of solid wood or veneers. Veneers are thin sheets of wood that are glued together to form a single layer.
How long does it take to finish a piece of furniture?
It depends on the size and condition of the furniture. You can finish smaller projects, such as boxes or picture frames, in one day. Larger projects, such as desks and dining tables, can take several days. It takes time in order to properly stain or seal the wood.
Do you know anything more about woodworking?
It is easy to underestimate how much work it takes to make furniture. Finding the right kind of wood is the most difficult part. There are so many varieties of wood available that choosing one can be difficult.
A problem is that wood doesn't have the same properties. Wooden can split or crack, while some woods may warp. These things should be considered before you buy wood.
How do I get started as a woodworker?
Woodworking is an art that takes patience and practice. It takes time to learn how to use all the different tools and techniques required for woodworking.
There are many different types of woodworking equipment available on the market today. Some people prefer to use power tools while others prefer manual tools.
The choice is yours, but you must ensure you choose the right tool for the job. If you don't have any experience, you may consider starting with a basic set of hand tools.
You might also want to learn how a router works, which allows you to cut wood into intricate shapes. These tools can be purchased at most hardware stores.
What tools are used by carpenters?
Carpenters use a hammer as their most common tool. A hammer is used for pounding nails into wood. It also helps them hold pieces together while they are working on a project. Other tools include clamps, pliers, screwdrivers, measuring tape, pencils, saws, drills, and wrenches.
Statistics
- Most woodworkers agree that lumber moisture needs to be under 10% for building furniture. (woodandshop.com)
- The U.S. Bureau of Labor Statistics (BLS) estimates that the number of jobs for woodworkers will decline by 4% between 2019 and 2029. (indeed.com)
- Average lumber prices rose about 600 percent between April 2020 and May 2021. (familyhandyman.com)
- Woodworkers on the lower end of that spectrum, the bottom 10% to be exact, make roughly $24,000 a year, while the top 10% makes $108,000. (zippia.com)
External Links
How To
How do I accurately measure wood?
We use several methods to measure wood. We use a digital scale (a tool for measuring distances), a laser-level (used to level your work surface), as well as a bubble level (used in order to level your work surface).
Two jaws are available on a digital scaler. One can open and the other close. The first jaw holds the object, and the second measures the distance between them. Digital calipers are great for measuring small distances, such as thicknesses of wood.
Laser levels have an infrared light beam that projects a line across the floor. A red dot is created by the laser. It is possible to see if the surface of the surface are even by looking down at it. Large surfaces can be checked for accuracy with laser levels.
Bubble levels look similar to a compass. The center of the device contains a bubble. The device will indicate whether the surface is level as long as it is centered. The bubble levels can be used to check the accuracy of smaller areas.